

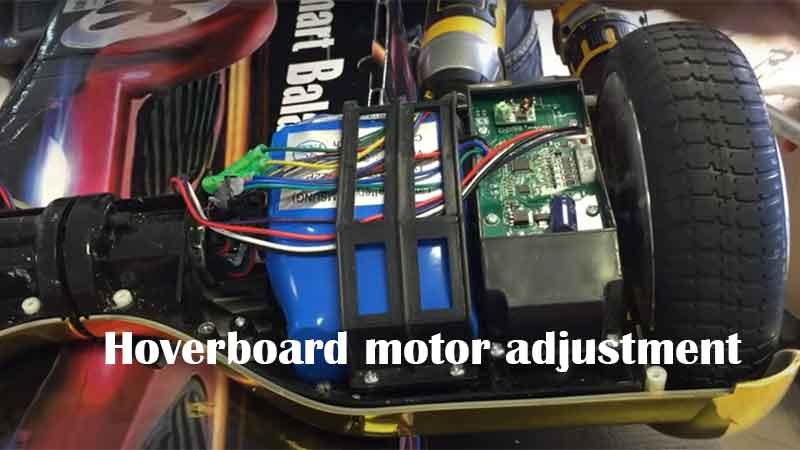
Hoverboard motor adjustment – this article is about how to do a motor adjustment. If your tires or rims are rubbing against the shell here, right over here, what you’re going to need is a Philips head screwdriver like this, and you’re going to take off this black plastic piece.
Hoverboard motor adjustment
You don’t need to take it entirely off. It’s a little easier if it’s on the motherboard side here then the battery side because sometimes they’re strung underneath in the case, that they are strung underneath, don’t be afraid to take this little plastic cage off.
I’m going to make it a little more complicated for everybody who happens to have a motor adjustment on the battery side. So, I’ve got my power tools here, and the Phillips head screwdriver, and I’m going to start undoing everything.

So, you’ve got two screws on each side, just unscrew those, and you can lift your battery cage right off. That gives you a little bit of room here, you don’t need to move this at all. The next thing, you were to do is take this plastic piece off every again four screws. Okay, so this will come right off, you can just set it right here to the side, and one of my screws came out.


I’ll just you know put it right back there, so this is where your motor is all kind of secure. Sometimes you have you got like hair and stuff in there, and what you’re going to need now is a six millimeter Allen wrench. I use an impact drill because it’s easy and I’m a professional. This is what I do, I use a husky hw6 bit, for anybody that’s wondering, otherwise husky also sells black T-bar handle, Allen wrench bits at Home Depot for less than $10.
So, we’re going to turn these counterclockwise as well. There is a lot of torque to them, so if you’re doing it by hand with a hand tool, just give it a lot of power. So, it comes right up for me, you don’t need to remove these completely. Now, what we’re going to do is, we’re going to take this, and you can slide it back and forth a little bit.

If you’re having a problem with a loose motor, or a loose wheel, then you can take these all the way off. And what you’re going to want to do is take a piece of double-sided tape, and put the double-sided tape in between the top piece here, which comes off. You’re going to put the double-sided tape, or in store wears it 3m foam, and you’re going to put just a strip right here, and then place this back on.
It’ll secure, it doesn’t move again. Once, you’re done, just kind of hand tighten these before you set it down like this, and then adjust it to where you want it to be. And then slowly tighten things down with your Allen wrench. Okay, don’t tighten them all down yet.

Hoverboard motor adjustment – Okay, once you get to where you want it, spin the wheel, and make sure it doesn’t rub, just like this. Once, you’re sure that it’s not rubbing, now you can tighten these things down, give it a lot of strength, and now we have a wheel that is torque down. It’s secure, it doesn’t rub more.
We take our plastic piece here, place it back on top, and we screw these down again. Don’t screw these too tight, because they might break the plastic. The next thing, you’re going to do if you took the battery cage off, let’s put the battery cage back on. You can put it over or under the wires, it doesn’t usually really matter.

It’s kind of a preference thing, and again don’t tighten too much, or you’ll break the plastic. Once, you’re done with that, plug the light back in on the bottom side of your shell that you took off earlier, screw the outside back down and on the outside.
DailySaw Hoverboard

You’re going to use the sheet metal screws that have the long winding pattern to them, and on the inside, you use the machine screws that have the short pattern to them. Securely, put it down make sure everything’s even, and then you spot drill the corners and then finish the middle. So, that’s what you’re going to do when you need to do a motor adjustment to make sure this isn’t rubbing anymore.
View Hoverboard Repair Services
Other Articles Review
- Review Swagtron T6 Off-Road Hoverboard
- Haloboard Product Reviews
- Reviews StreetSaw Hoverboards
- Halo Board Rules
- Official Halo Rover Hoverboard Review


 H1 is powered by two 200W motors that enable it to climb 15 degree inclines and reach a 9 mph top speed. The 6.5″ solid wheels provide a smooth and enjoyable ride.

